Friday, December 19, 2014

1 Hour Cinnamon Rolls

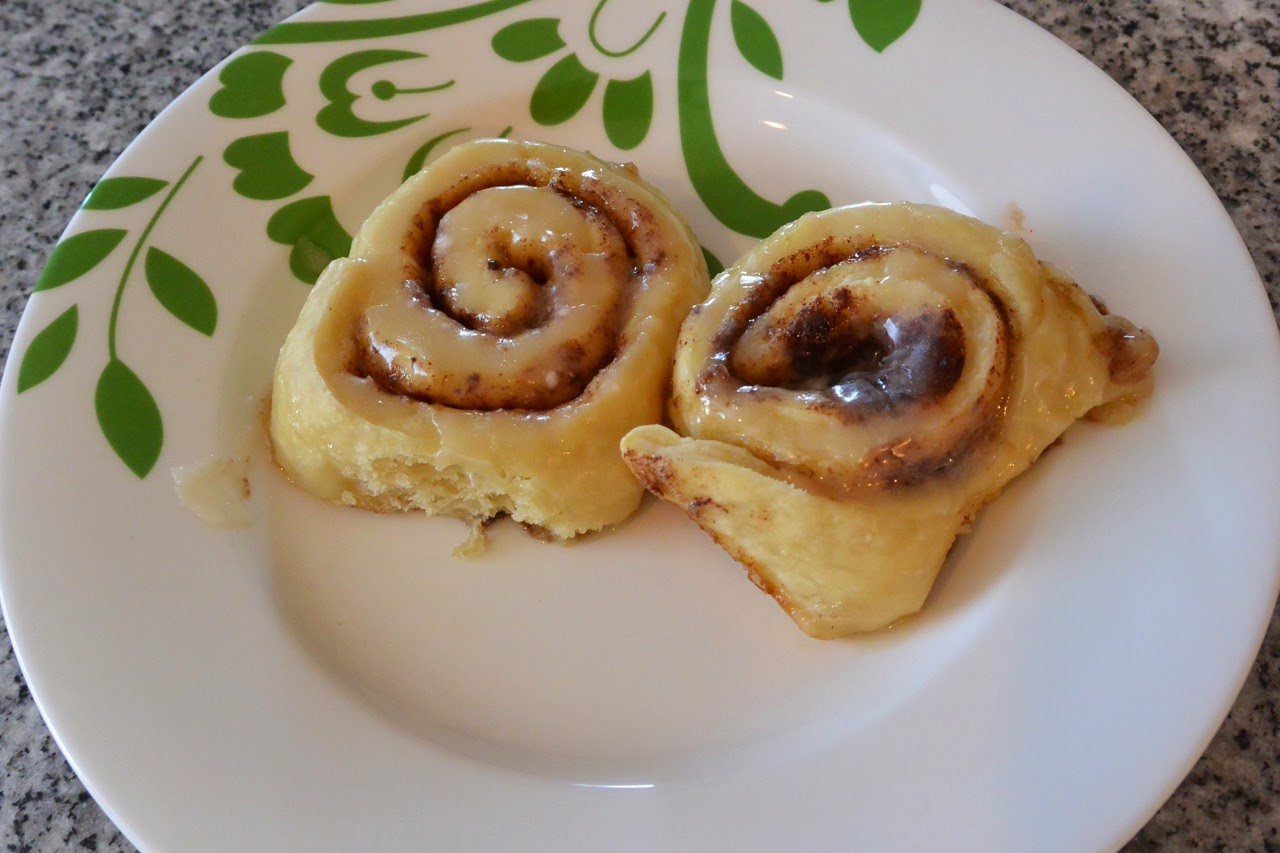
What to make for Christmas morning breakfast that won't take hours to prep/bake/frost?! 1 Hour Cinnamon Rolls! I found this recipe and decided to try it out. I made these cinnamon rolls the night before I was going to bake them, so I let them rise as directed in a warm oven and then let them come to room temperature, covered them, and placed them in the refrigerator. I thought they would continue to rise, but I think they shrunk a tiny bit. Next time I will bake them after letting them rise and just reheat them in the morning, as not to compromise the dough. In the end, they were still delicious and I had a very happy family during our "Early Christmas" celebration!

*Also, maybe I need different dental floss - but mine did not help with slicing my rolls. I ended up using a knife.

1 Hour Cinnamon Rolls

Dough:
- 3 cups flour
- 1/4 cup sugar
- 1 packet Rapid Rise instant yeast
- 2 tbsp. butter
- 1 egg
- 1/2 cup water
- 1/4 cup whole milk (I used Egg Nog!)
- 1 tsp. salt

Filling:
- 2/3 cup brown sugar
- 1 tbsp. cinnamon
- 1/4 cup butter, softened
- 3/4 tsp. vanilla
- 1/4 tsp. almond extract

Vanilla Glaze:
- 1 1/2 cup powdered sugar
- 2-3 tbsp. milk
- 1/4 cup butter, melted
- 1 tsp. vanilla

1. To make the dough, place your flour, salt and yeast in your mixer.
2. In a microwave safe bowl, place your butter, water, milk, and sugar. Heat for about 1 min 30 seconds on HIGH, or until all ingredients are hot and butter is almost melted.
3. With your dough hook on your mixer and on the lowest setting, slowly add your milk mixture to your yeast mixture. Mix until a sticky dough forms on the hook.
4. Preheat your oven to 200 degrees.
5. Knead your dough and cover it with plastic wrap. Allow it to rest for about 5 minutes.
6. Once your dough has rested, lay it out on a floured surface and roll it out to 16"x9".
7. Mix your filling up and spread it on your dough.
8. Roll your dough up lengthwise and cut 12 rolls out of your dough.
9. Grease a 13"x9" baking dish and place your cinnamon rolls in it.
10. Turn off your oven. Place a piece of foil on top of your baking dish and place your cinnamon rolls in the warm oven for 25 minutes.
11. Take out your rolls (they should have doubled in size) and preheat your oven to 375 degrees.
12. Once preheated, bake your cinnamon rolls for 15 minutes.
13. While your cinnamon rolls are baking, mix up your vanilla glaze and drizzle on top of your cinnamon rolls when they come out of the oven.


 Dough rolled out with filling

Dough rolled up and cut in 12 rolls

 Top: Cinnamon rolls before placed in the oven
Bottom: Risen cinnamon rolls (not sure what happened in the bottom right corner)

 Vanilla Glaze

 Baked cinnamon rolls with glaze

Christmas Breakfast

Merry (Early) Christmas selfie from my family to yours!

Enjoy!
Brittney

Tuesday, December 16, 2014

DIY Vanilla Latte Scrub

Now that I made the Gingerbread Scrub - I had to try my hand at a scrub with coffee in it! I found this scrub on Pinterest and it even explains why each ingredient was selected for the scrub. Sounds like a nice healthy scrub to be using if you ask me! I used Dunkin Donuts Vanilla ground coffee and this scrub smells delicious! This can even used as a nice to gift to give a coffee lover or a sweet friend for the holidays.

Vanilla Latte Scrub

*Free printable

- 1/4 cup coffee - reduces inflammation, gets rid of cellulite, and has been linked to reduce skin cancer.
- 1/4 cup brown sugar - moisturizes skin, breaks down cells, regenerates skin, and exfoliates!
- 1 tsp. baking soda - adds to exfoliation and cleanses the skin.
- 1 tsp. vanilla - for the scent!
- 1/2 tsp. cinnamon - spice known to prevent infection and kill bacteria.
- 1/4 cup olive oil - known to moisturize your skin, protect it from sun damage, and most people are not allergic to it.
- jar with a lid

1. Mix all ingredients, but olive oil, together.
2. Slowly add olive oil to get the consistency you like.
3. Store in a jar with a lid and add the label!

 Ingredients before adding olive oil

 Vanilla Latte Scrub

Cute gift with a printable!

Enjoy!
Brittney


Sunday, December 14, 2014

DIY Gingerbread Scrub

What to get that teacher who spends patient hours with your child a few times a week for the holidays?! Gingerbread Sugar Scrub is here to save the day! This was easy to make and looks so cute in the little mason jar. I even used a holiday cupcake liner in the lid of the mason jar. Our school even provided the teachers a questionnaire that answered where they like to eat/shop/hobbies etc. So that helped me figure out what gift card to attach to their sugar scrub. Gift complete!

I did not use almond oil, instead I used extra coconut oil. I got a nice consistency and the ingredients smelled like Gingerbread until I added the coconut oil. I really think if I scooped some out and used it, I would smell more of the gingerbread. But who doesn't like smelling like coconut oil?! No complaints here! This recipe made enough for 2 of the mason jars showed below.

Gingerbread Sugar Scrub (makes 2 1/2 cups)

- 1 cup brown sugar
- 1 cup granulated sugar
- 3/4 cup coconut oil
- 1/2 tsp. cinnamon
- 1/2 tsp. nutmeg
- 1/2 tsp. all spice
- 1/2 tsp. ginger
- lid with a jar

1. Mix all ingredients but your coconut oil together.
2. Slowly add your coconut oil to get the consistency you want in your scrub.
3. Place in a jar with a lid.
4. This link has an adorable free printable that I attached to my jar that reads "Gingerbread Sugar Scrub."

 Dry ingredients

 Gingerbread Sugar Scrub

Happy Holidays!

Enjoy!
Brittney

Tuesday, December 9, 2014

Grinch Cookies

Every year I get a group of friends together and their kids for our annual 'Christmas Pajama Play Date.' Well this year was a tad different because everyone has another kid and our 'little' group grew a little more! 13 kids total. So my sweet friend bought a new, bigger house this year, and we threw the play date at her house! What a blast the kids had - chaos, cookies, and SUGAR! Of course all the kids wore their Christmas pajamas. I love traditions and this one is my favorite to do because I am a mommy now and my kids love this time of year!

I've been trying really hard to teach my 4-year-old that Christmas is more than just about presents. It's hard to understand this, so we have been reading/watching "Dr. Seuss' How the Grinch Stole Christmas." My kids love the book! I think it has a really valuable lesson to teach about Christmas meaning more than just about stuff. So, for the play date we had the kids decorate graham cracker gingerbread houses and decorate a cookie with frosting and sprinkles. I also made some "Grinch Cookies" that turned out delicious!

*Disclaimer: since it's not Valentine's, it's really hard to find heart sprinkles, so I ordered mine off of eBay.

As a take home party favor, I made "Grinch Dust" out of sugar and food coloring with a poem.

Grinch Cookies

- 1 box white or vanilla cake mix
- 1/3 cup flour
- 2 eggs
- 1/2 cup vegetable oil
- 2 drop green food coloring
- 1/4 cup powdered sugar
- heart sprinkles

1. Mix cake mix, eggs, flour, oil together.
2. Add your food coloring.
3. Allow dough to firm up in your refrigerator for 10 minutes.
4. Make 1 inch balls with the dough and roll in powdered sugar. Place on a parchment paper lined baking sheet.
5.  Place one heart sprinkles in the middle of each dough ball.
6. Bake at 350 degrees for 7 minutes.

 Ingredients

 Green Dough

 My little cookie helper

 Grinch Cookies about to go into the oven!

Grinch Cookies

"Grinch Dust"

 Palmer and Vaughn decorating gingerbread cookies

 Babies in pajamas!

 Big kids in pajamas!

Goofy faces!

Enjoy!
Brittney


Thursday, December 4, 2014

Eggnog Waffles

Looking for something festive to start your day with? You need to make Eggnog Waffles! So heat up your waffle iron and whip up the ingredients below and enjoy! I topped mine with a little butter, syrup, and a small dollop of Cool Whip.


Eggnog Waffles

- 2 cups flour (extra flour included for high altitudes, original recipe called for 1 3/4 cups)
- 1 tbsp. baking powder
- 1 tsp. salt
- 1 tbsp. sugar
- 3/4 tsp. cinnamon
- 1/4 tsp. nutmeg
- 2 eggs
- 1 1/2 cups Eggnog
- 1 tbsp. vegetable oil (added for high altitudes, not included in original recipe)
- 6 tbsp. unsalted butter, melted

1. Mix all dry ingredients together.
2. Mix all your wet ingredients together.
3. Pour wet ingredients into your dry ingredients. Pour onto waffle iron.
4. Top as desired. Serve warm!

 Batter and Eggnog

 Waffle Iron

Eggnog Waffles!

Enjoy!
Brittney


Monday, December 1, 2014

It's a Whimsy Christmas

This year I have been wanting to change up my holiday 'color scheme' to something more fun! In the past I have pretty much stuck to the traditional gold/red scheme. But this year, I saw this amazing tree on Pinterest in these fun bright colors and I just had to try it out. Bright blue, pink, and green are my colors this year! I bought a lot of my decor from Hobby Lobby, and ALL of their Holiday decor is 50% off. We have a small 4-5 ft. tree this year since we will be traveling during Christmas, so there wasn't too much extra room to work in a lot of decorating. I bought some extra ornaments in my color scheme and honestly, there just wasn't any room left on our tree to include them, so those went back to the store.

I made these two huge bows with blue, pink, and green ribbon and tied them at the top of the tree. Then I used extra pieces of ribbon and tied them with this 'twisty tie' stuff I found at Hobby Lobby to create cascading ribbons on the tree. I love it!

As for my mantle, I bought paper mache letters to spell "NOEL" and painted them with acrylic paint. Then, I just taped them onto our stocking holders. I made another bow out of the ribbon and attached it to one side of the garland. I found some clear and inexpensive (also 50% at Hobby Lobby) candlestick holders to display my Gumdrop Christmas Trees better over the garland. I also found some fun 'whimsy' extra decorating stuff to stick in my garland (as shown).

For my bar area, I made my own Ornament Wreath to hang in front of my mirror and purchased a semi-matching ornament tree at Target. My kids made a Gingerbread House to display. For my "Grinch Quote" Canvas, I painted an old canvas (from a Painting & Wine place) white and green and free-handed the quote with red acrylic paint. Easy to do!

We are so excited for the Holiday Season and I hope these decorating ideas help you out! Happy Holidays!

 Our Small Tree

 Bows

 "Snickers" the Elf is watching you... so you better be good!

 Ornament Wreath, tree, and Grinch canvas

 The Mantle: bow, gumdrop trees, "NOEL," and stockings hung with care

 Bow and gumdrop trees

NOEL (Merry Christmas in French)

Enjoy!
Brittney

Gumdrop Christmas Trees

It's December 1st, so I can now share with you all my decorating ideas for this Holiday Season! These cute gumdrop trees were super easy to make. I've had a few people ask me if I made them with toothpicks... these trees are much bigger in person and that would have been a LOT of toothpicks - I used my glue gun! You can make these 'candy' trees with any type of holiday candy such as peppermints, red/green gumdrops, marshmallows, fruit o's, etc. Have fun with this and decorate! I hope to get some candle holders to place my trees on top of to make them even taller on my fireplace mantle. Stay tuned.

Gumdrop Christmas Trees

- foam cone forms
- glue gun
- lots of gumdrops

1. Hold cone in your hand upside down and make a line of hot glue.
2. Stick on your gumdrops.

Easy!

 Foam cones and gumdrops

 Gluing gumdrops

Gumdrop Christmas Trees!

Enjoy!
Brittney

Saturday, November 22, 2014

DIY Ornament Wreath

I have seen these gorgeous ornament wreaths everywhere lately and I thought I could make one. Just needed some ornaments, a wreath form, and a glue gun. I chose a 7" wreath form and small ornaments I found at Walmart. I should have gotten a mixture of larger bulbs and smaller ones to fill it better because my "little" 7" wreath actually took a lot of ornaments to fill... 105 to be exact. I started off with 60 and ended up rushing back to buy more TWO more times! I saw a wreath similar in size to mine to be about $30 and I probably spent around $24. Not sure if all the gas I used up driving to and from to get more ornaments racks up the overall price of my wreath... but I love it so much and I can't wait to hang it up! I want to try hard to stick to these fun whimsy colors this year for Christmas decorations and our tree. Looking forward to sharing it all with you once we get into December!

DIY Ornament Wreath

- shatterproof ornaments, varied sizes
- glue gun
- styrofoam wreath form
- ribbon

1. Lying your wreath form flat, line the outside and inside of your form with ornaments.
2. Hot glue your ornaments down.
3. Continue to move in a circular fashion gluing your ornaments down.
4. Glue a small piece of ribbon to the back to hang your wreath.


 Glue gun, wreath form, ornaments

 Lay your wreath flat and hot glue ornaments to the inside

 Hot glue ornaments along the outside and start to fill in the center

Completed wreath!

Ribbon glued to the back to hang

Enjoy!
Brittney

Tuesday, November 18, 2014

Paper Bag Popcorn Turkey

This Thanksgiving we will be having a separate "kids table" for our two boys. I plan to use their small kids table and chairs, cover the table with butcher paper so they can color on it, and place a big Paper Bag Popcorn Turkey in the center! Kid approved appetizer if you ask me! This is my trial one for next week's festivities, but it did not take long to make and it really can hold a lot of popcorn. Next week, I will be buying a big bag of pre-popped popcorn to help me fill the body of the turkey better. I can't believe Thanksgiving is next week - where did November go?!

Supplies

- 4-5 bags of popcorn
- 1 large paper bag
- 2 small paper bags
- 1 piece of white paper
- scissors
- glue gun

1. Take one of the small paper bags and make a fist with your hand, stick it in the bag and round out the corners of the bag. Fill it 2/3 full with popcorn, twist the end, and glue gun it shut. Repeat with the other small paper bag, these are the turkey 'drumsticks.'
2. Fold your white piece of paper lengthwise, cut it in half and then cut that piece in half again. Cut a bunch of slits on one side of your strip of paper. Hot glue gun the strip with the frills facing out around the 'stick' of each drumstick.
3. Take your large brown paper bag and round out the corners the best that you can. Fill it full of popcorn, hot glue it shut and fold the bag underneath. If you are using buttered popcorn, try to line your bag with parchment paper to avoid grease stains.
4. Glue your drumsticks to each side of your turkey. Cut the top of your turkey down the center to eat the popcorn.

 Supplies

 How to make your Turkey Drumstick "frill"

 Parchment paper lining the inside of the large paper bag (I used kettle corn)

 Turkey body and two drumsticks

 Turkey body glued and folded underneath

 Paper Bag Popcorn Turkey

Gobble, gobble!

Enjoy!
Brittney

Homemade Tomato Soup

I have been trying to make some warm dishes since it is so cold out! I have a "The Best of Fine Cooking: Weeknight Dinner Recipes" magazine I got from a local grocery store a few years back that has some great recipes. I have been making a few things from it to include this Homemade Smoky Tomato Soup! It has bacon. It is a winner. I served the soup with grilled cheese - I love comfort food!

Ingredients

- 1 tbsp. olive oil
- 3 strips of bacon
- 1 large onion, diced
- salt
- 1 tbsp. flour
- 1 tbsp. chopped fresh thyme
- 1/2 tsp. sweet or hot smoked paprika (pimenton), I used regular paprika
- 1 x 28 oz. can of whole tomatoes
- 2 cups low sodium chicken broth
- 2 tbsp. heavy cream
- black pepper

1. The oil in a large saucepan and add the bacon and cook over medium heat. Transfer finished bacon to the side and allow to drain excess grease on a paper towel. Coarsely chop your bacon.
2. Add the onion to your bacon greased saucepan with 1/2 tsp. of salt. Cook until onion begins to brown.
3. Sprinkle the flour on top of the onions along with 2 tsp. of thyme, and paprika. Cook for 1 minute.
4. Add the tomatoes and chicken broth, bring to a boil, reduce to a simmer for 20 minutes. Stir occasionally to allow to thicken.
5. Using a blender, (I used my Magic Bullet with Pitcher attachment) in batches, puree your soup. Return the soup to the pan, stir in the cream, bring to a boil.
6. Season your soup with salt and pepper as desired.
7. Serve with bacon and remaining thyme.

Homemade Tomato Soup

Enjoy!
Brittney

Saturday, November 15, 2014

DIY Lego Party and Cake

We have been celebrating my son's 4th birthday ALL. WEEK. LONG. I can't believe I have a 4 year old and I can't believe all the celebrating is over! Boy are we exhausted! But we had the best time! This year my son has been obsessed with Legos so we had a Lego themed party. There are so many creative ideas on Pinterest, but I decided to use only a few and to keep it simple. Snacks and cake for food - cheese and crackers, juice boxes, popcorn, fruit salad, and cake. I made the cake myself in the shape of Lego pieces making a giant "4," with homemade white chocolate buttercream frosting. The cake turned out so cute! Below is how we decorated and how I made the cake. "Everything is Awesome!"

 Lego decorations don't really exist - so I stuck to red, yellow, green, and blue! Make your own Lego piñata here

 Made a "4" out of Lego Duplos and printed the sign FREE from here 

Treat Bags: party bags from Party City, printed "Lego" circles here, scissors, and glue stick

Each kid got a treat bag for their piñata treats and a Lego "minifigure" to build - so much fun discovering which surprise figure they got!

Streamers and "4" Lego sign

 "Happy Birthday" Lego sign I made with scrapbook paper, large hole punch and printed letters I cut out

"Thank You" tags inspired from this free printable, which I made my own writing around in PowerPoint, printed on construction paper, and tied to "Lego" candy I bought from here

I had the kids "Guess How Many Legos" were in the jar - most popular guess was the number "10" - Oh four-year-olds!

 The Cake: dyed white chocolate buttercream frosting, Sheet cake cut and maneuvered to form the number "4" and Oreos were used as the bumps on Legos
Inspired on Pinterest by this picture

Happy 4th Birthday, Kinley!

Who doesn't love cake?!

Enjoy!
Brittney