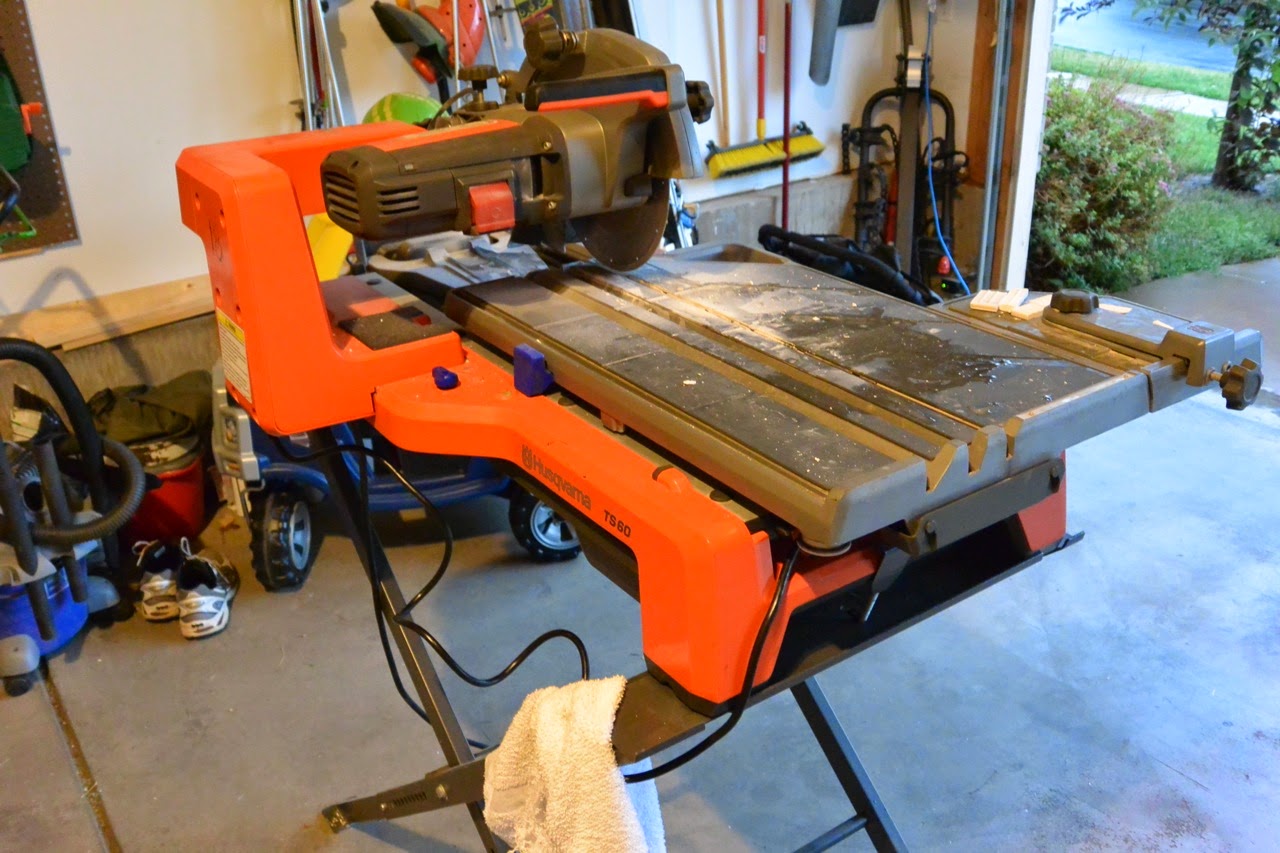
If you are considering doing your own backsplash, we bought all our supplies at Lowe's and rented a water saw from a local power tools place for $44/day (we only needed one day). I'm so glad Kyle was here to do this with me, because having a huge saw inches from your eye to cut tile, scared me. So, Kyle was in charge of that!
Phase II: Granite and Sink Installation
*We had to have a Plumber come before the granite could be installed to turn off the water in the sink and dishwasher. We also had to purchase a new garbage disposal (ours was pretty old and the rubber was worn out) and a new faucet. The granite we purchased came with a sink, there were many to choose from. We went with a deep banjo sink and are incredibly happy with it! Also, you need to schedule a plumber to come out the following day after your sink installation because it takes 24 hours for your sink to dry, it is glued to the bottom of the granite. The plumber will hook up your new faucet, disposal, and dishwasher.
Before picture of laminate countertops
New granite!
Granite up-close on island
Banjo sink with Delta Ashton faucet
Phase III: DIY Subway Tile Backsplash
Supplies Needed
- notched trowel
- level
- Mastic
- tile spacers, we used 1/8"
- level
- speed square
- ceramic tile cutter
- water power saw
- subway tiles (we used around 200)
- grout, we used DeLorean Gray color
- grout trowel
- grout sponge
- clear silicone chaulk
1. Find a starting point for your tiles, we started in the middle of where our stove would sit, but ended up tearing all that down and starting on the far left side and moving from left to right. It is easier to cut tiles in half using a ceramic tile cutter.
2. Draw a straight line with your level where you want to start. Cover area with Mastic using your notched trowel and ensure there are lines from the trowel indented into the adhesive. Apply your tiles firmly. Use your tile spacers as you place your tiles up.
3. As you apply your tiles, make sure you plan for areas that will need cut tiles, such as electrical outlets. Using a speed square to mark off your cuts will help you when cutting the tiles with the wet saw or ceramic tile cutter.
4. Once you have allowed your adhesive to fully dry, apply your grout. Our grout came pre-mixed and did not need a sealer.
5. Using a grout trowel, apply your grout at a 45 degree angle to ensure it gets in between your tiles.
6. We did this in 4 sections, taking the time to wipe away the excess grout with the grout sponge that was damp with warm water. This will help your grout to adhere between the tiles. Our grout looked light grey during this step, but ended up drying much darker.
7. Once the grout has dried according to its directions (usually 24 hours), apply a thin bead of clear silicone where the granite and subway tiles meet to keep water from getting behind the cabinets and causing damage.
Left: Ceramic tile cutter, Right: Type 1 Mastic tile adhesive
Wet Saw in our garage
Center point where we started our tiles (changed later...)
Applying Mastic with notched trowel
Subway tiles with tile spacers
Tile cuts made with wet saw to fit around outlets
Finished - tiles are drying!
Subway tile backsplash complete
Subway tile backsplash
Applying grout with grout trowel and finger
Grout looks light gray
Difference between tiles with grout and without
Going over tiles with damp towel after using the grout sponge (yellow sponge in lower left corner)
Clear silicone
Applying silicone where granite and tiles meet
Clear bead of silicone
Silicone seal after we went over it with a damp finger to wipe away excess (read directions on your silicone tube)
Kitchen complete!
Stained cabinets, subway tile backsplash, and gray grout
Enjoy!
Brittney


Congratulations on your successful kitchen re-do! I realize that you wanted to DIY all the way, but there are cases where calling the professionals for big and complex parts is a must. Plumbing can be quite complicated, which means hiring a plumber to do all those reduces the stress on yourself, and leaves you free to concentrate on other matters. Thanks for sharing!
ReplyDeleteLevi Eslinger @ Capital Plumbing
This site is good because they give us a new thing and new ideas and new topic how good all of they are we should appreciate them because of these good thing.
ReplyDeleteI know something information, to know you can click here. Kitchen remodeling Austin
ReplyDeleteInformative article, exactly what I wanted to find.
plumbing services Edmonton