Friday, May 2, 2014

Pottery Barn Inspired Boys' Bathroom

I have been wanting to update my boys' bathroom for some time now. It needed to be more 'boyish' and 'truck-ish', so now it is! I tried to do this redecoration on a budget, so I found items that resembled those from Pottery Barn Kids, at better prices. I did, however, splurge on PBKids Airplane Transportation Towels - but they were on sale! I hope you enjoy their new bathroom as much as they do (and I do!).

 Green trashcan, $10, and Green toothbrush holder $5 from Target

 Sink Area

 Shower Curtain, $20 from Target, similar Pottery Barn Kids one for $59.50, green bathmat from previous decor from Target

 Pottery Barn Kids Airplane Transportation Towels, 3 for $32.50, PBKids green towel $8.50

 Etsy Transportation prints $7.50 each, Michael's frames on Clearance $9.99 each

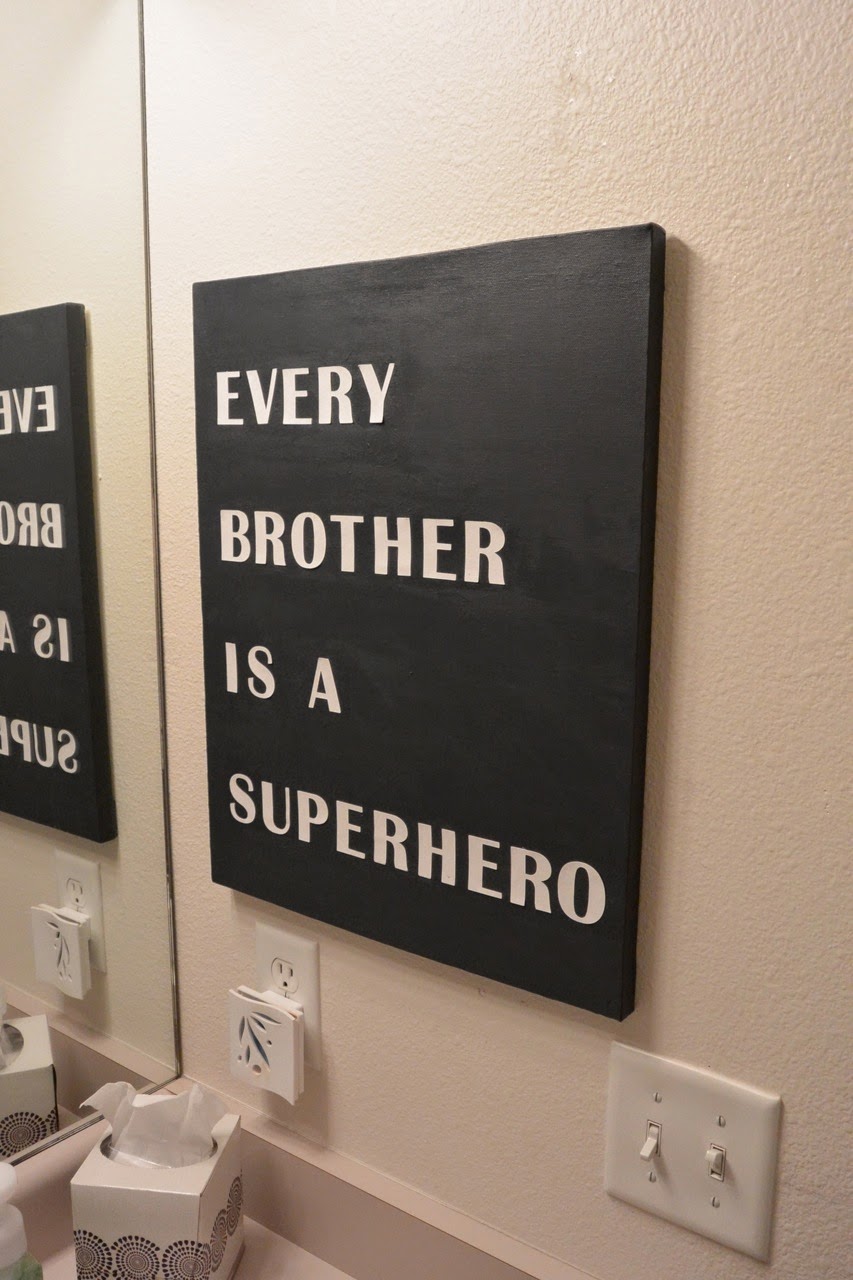
Canvas I made that cost nothing!

I guess I spent a little over $100... not bad... I'll take it!

Enjoy!
Brittney

Tuesday, April 29, 2014

Sister Box and Soft Oatmeal Raisin Cookies

As most of you know I used to be in the Army, so I know how hard it is to be away from family and friends for a training exercise. My sister is currently at JRTC in Ft. Polk, LA for a month and finally gets to come home in a few days! I thought it would be nice to send her a few goodies so she feels loved and missed when she returns to her apartment. I even made her some amazing Soft Oatmeal Raisin Cookies, per her request. I am so proud of my little sister and hope we get to see each other soon.

Soft Oatmeal Raisin Cookies (makes 3 dozen)

Ingredients:

- 1 cup butter, softened
- 1 cup brown sugar, packed
- 1 cup gradient sugar
- 1 tsp. vanilla
- 2 eggs
- 3/4 tsp. baking soda
- 3 cups flour (plus 3 tbsp at high altitude)
- 1 cup oatmeal
- 1 1/2 cups raisins

1. Beat butter and sugars together until fluffy.
2. Add eggs and vanilla.
3. Add flour, baking soda, oatmeal and raisins. Place on a parchment lined baking sheet. I used my 2 tbsp cookie scoop.
4. Bake for 8 minutes at 350 degrees.

 Creaming butter and sugars together

 Adding vanilla, eggs, baking soda, and oatmeal

 Oatmeal Raisin Dough

 Cookie dough formed

 Cookies ready to be packaged up!

 Soft Oatmeal Raisin Cookies

"Sister Box" completed with Ashley Brooke Designs tank, chalkboard labels, Owl tote, pens, notecards and chalkboard coasters

Enjoy!
Brittney

Sunday, April 27, 2014

Meal Planning

I enjoy cooking and planning. Those two things might go hand-in-hand when it comes to planning dinner meals for the week... I have recently had a few people ask me if I meal plan and how I do it. So I decided to share!

Usually, the night before I plan on grocery shopping I make my list. It is really important that you check to see if you already have some of the ingredients for whatever you plan to make in your pantry. Sometimes it doesn't happen and you wonder why you have 3 jars of spaghetti sauce... I also am an avid Pinterest user and that's where I get most of my recipes for meals. Of course I do use past recipes, too. My planning for dinner for the week is usually 4-5 meals, since one night we might go out to dinner or have leftovers. I also love making meals that don't take too much time, since I don't have a lot of time to commit to meal making in the evenings. So, usually I include a slow cooker meal in my week because that makes dinner even easier that night!

My grocery list consists of the fresh items I need for the meals I plan to make. We do not eat a lot of processed food, so I do grocery shop once a week for fresh fruits/veggies and meats. Also, because we don't buy a lot of processed foods, I don't really see a need to coupon very much since there usually isn't a coupon for the fresh foods my family eats. My list also contains items my family is low on or needs - toiletries and snacks.

Below is a picture of my list this week and a calendar of what I plan to make for the week. Of course the order of the meals are easy to switch up if necessary! I usually commit about 20 minutes to write my list and decide what to cook for the week. Happy Meal Planning!

Grocery List and Calendar of Meals

Enjoy!
Brittney

Saturday, April 26, 2014

Painting an Exterior Door DIY

To continue my theme of painting my house - the front door was tackled with some fresh paint yesterday! I just finished the second coat and my door is Spring ready! I was inspired by this blog and got myself a quart of outside weather friendly paint and got to work. Love the results! Now my husband just needs to power wash the house...

Supplies

- quart of paint, I used Valspar Ultra Paint+Primer for the Exterior with a Satin finish (You can always ask the paint consultant at your local hardware store for suggestions in selecting the right paint), color: Lincoln Cottage Lattice Green
- paint brush
- paint tape

1. Wash your front door with some soapy water and let dry.
2. Tape off your door hardware so you don't get paint on them.
3. Paint your door! I used two coats. Let dry.

 Paint

 Old Paint with taped off hardware

 Fresh Paint!

 Finished door

And it was homemade pizza night... my pizza dough is amazing!

Enjoy!
Brittney

Wednesday, April 23, 2014

DIY Pottery Barn Kids Artwork for Boys

On top of fixing up our laundry room, I also decided to re-do the boys' bathroom. It used to be Pottery Barn Kids "The Very Hungry Caterpillar" theme and now it is more grown up with pieces that can be changed as the boys get older. I will post the finished result once some backordered towels arrive next month! For now, I wanted to make my own PB Kids Inspired Artwork to hang. This project cost me NOTHING to make! Here is where my inspiration came from.

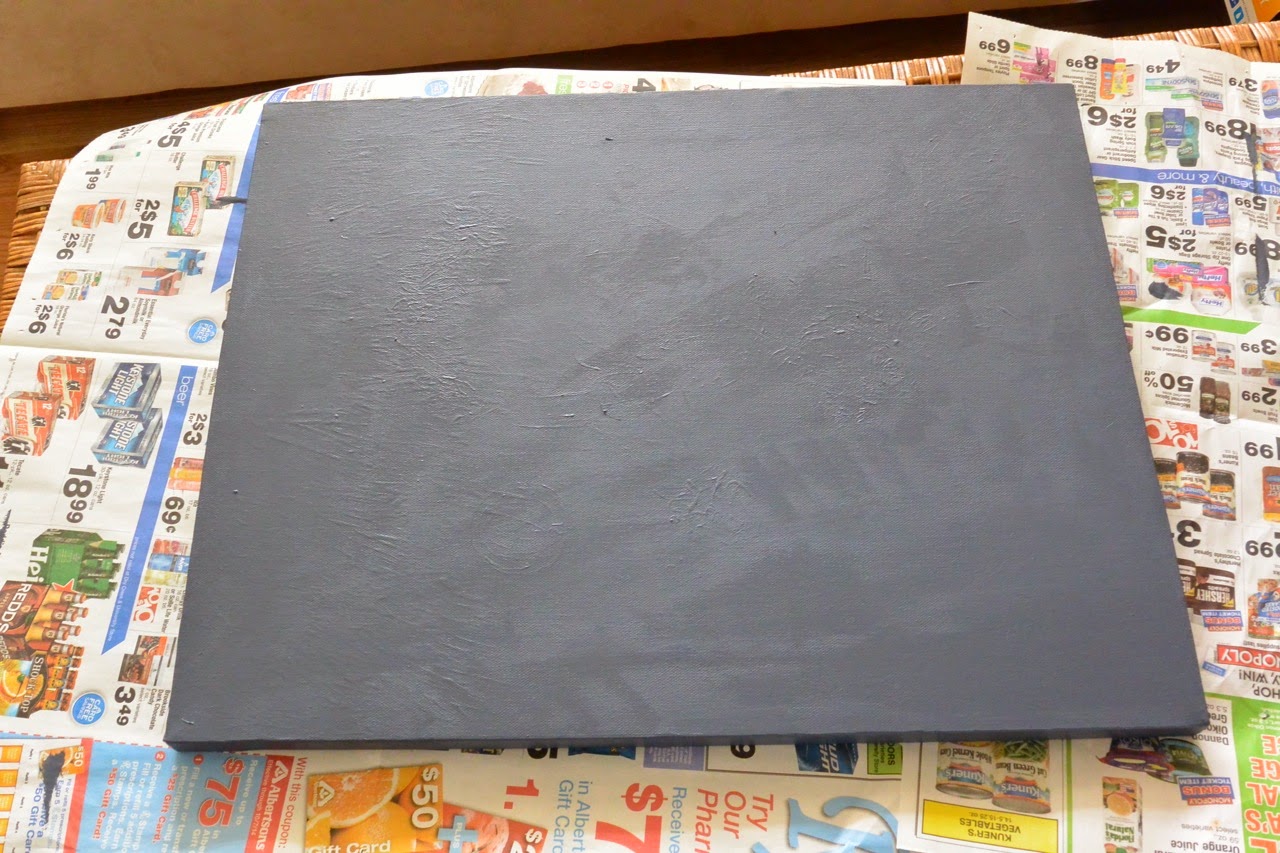
I used a canvas I had painted a picture of a bunny on from one of those "wine and painting" places. I painted over the canvas a plain navy blue with leftover paint from painting my son's nursery. I then asked a sweet friend of mine if she wouldn't mind cutting some letters out for me (using her awesome Silhouette machine) that said "Every Brother Is A Superhero" on some white cardstock - and she did - for FREE! We even made a play date out of it for our boys. Using Mod Podge I just placed the letters where I wanted them to be and glued them down. I am extremely pleased with the result and can't wait to share the rest of the bathroom re-do with you all!

 Painted canvas

 Placing cut letters on canvas with transfer paper

Finished Artwork!

Enjoy!
Brittney

Tuesday, April 22, 2014

Laundry Room Floating Shelves DIY

I've been absent and busy with Spring cleaning chores and re-doing our laundry room. Our laundry room used to be this awful shade of yellow (it came with the house) with one rickety shelf. So I painted the laundry room white (Martha Stewart "Glass of Milk") and my husband built two floating shelves out of plywood and pine. This project was extremely inexpensive, considering we didn't have to buy pre-made shelves from Pottery Barn! I used this blog DIY as inspiration.

The plywood cost $45 for a sheet, which we had cut in half to make 2 shelves. The pine was 2 inches thick and cut to the length of our room and then the length we wanted the shelf to be. Pine was about $5 per strip. We used 3" drywall nails to secure the pine to the walls and then my husband used a stud finder to drill holes into the walls to really secure the cleats. He then just laid the plywood 'shelf' on top of the pine cleats and nailed it to the pine. The front part of the shelf is 2 3/4" pine nailed to the pine cleats and plywood shelf as a decorative finish. I then painted the shelves white.

Now I just need to reorganize my laundry stuff and craft stuff in pretty bins! Off to Target tomorrow!

*I won't include specific measurements of our shelves since every laundry room is different and you may want different spacing between your shelves!

 Before/After - Big difference! 

 Before: Laundry room with awful shelf

 2" pine cleats in place

 Plywood shelves in place and being nailed down

 Front decorative pine nailed in

 Finished shelves - putting laundry room back together

White shelves with lots of room for organization!

Happy Spring Cleaning!
Brittney

Friday, April 18, 2014

Dark Chocolate Raspberry Birthday Cake

Every year I make my husband a cake for his birthday. It is usually chocolate. This year it is a DARK chocolate cake with a raspberry filling, frosted with a chocolate buttercream. Get your forks ready - this cake is sinfully delicious!

To celebrate we are headed to Breckenridge for the weekend so my husband and son can enjoy skiing before the season ends. Yes, skiing in APRIL. Oh Springtime in Colorado!

Dark Chocolate Raspberry Cake

- 2 cups flour (plus 2 tbsp. at altitude)
- 1 cup dark cocoa powder
- 2 cups sugar
- 1 tsp. baking powder
- 1 tsp. baking soda
- 1 tsp. salt
- 2 eggs
- 1 cup sour cream
- 1/2 cup canola oil
- 1 tsp. vanilla
- 1 tsp. white vinegar
- 1 cup hot water

1. Combine and mix sugar, eggs, sour cream, oil, vanilla, vinegar, hot water in your mixer.
2. In a separate bowl combine flour, cocoa, baking powder, baking soda, and salt. Slowly add to the wet mixture.
3. Grease two round cake pans and place half of the batter in each. Bake at 350 for 35-40 minutes.

Raspberry Filling

- 1 cup butter, softened
- 3/4 cup raspberry jam
- 1 1/2 cups powdered sugar

1. Mix all ingredients in your mixer. Wait for cakes to cool completely before spreading filling in between the cakes.

Chocolate Buttercream Frosting

- 1 cup butter, softened
- 6 oz. bittersweet chocolate, melted
- 2 cups marshmallow cream
- 3/4 tsp. vanilla
- 6 tbsp. powdered sugar

1. Combine all ingredients together and chill for 20 minutes before frosting your cake.

 Bottom layer with Raspberry Filling

 Cake frosted with Chocolate Buttercream

Happy Birthday, Kyle!

Also... the Easter Bunny made an early visit last night... Healthy yogurt covered raisins inside the eggs, and a few Peeps and jellybeans! Have a great Easter weekend!


Enjoy!
Brittney