Thursday, August 29, 2013

Ladies Night Dessert

I am going to a "Ladies Night" tonight with my close friends and I just can't bring myself to show up 'empty handed.' I saw this recipe and knew I had to try it! And I also had to try one, to get a picture of it for my blog, of course! I must say, the tiramisu brownies are delicious, but the coffee taste is rather strong. I may consider using only 2 tbsp. overall of the instant coffee, especially if I use the Nescafe, as that coffee tends to be on the stronger side anyway! I also like that the recipe called for sour cream as opposed to the original Tiramisu trademark of mascarpone. The sour cream mellows out the sweetness of the Cool Whip topping while taking away a bit of the bitterness of the coffee. The brownie is nice and sweet, so combining the bitter and the sweet bides well for the palate. Also, I was unable to locate some Lady Finger Cookies to use, so I used some shortbread cookies. The cookies did not maintain their integrity once the hot coffee was poured on them, so I had cookie mush to work with. Next time I will find those Lady Fingers, they really soak up liquids better while maintaining their shape. Hopefully the ladies enjoy them tonight - since they aren't too sweet or too bitter!

Ingredients:

- 1 box brownie mix
- 1 cup sour cream
- 1/2 cup milk
- 1/2 cup hot water
- 4 tbsp. instant coffee, divided
- 16 oz. container Cool Whip
- 2 1/2 cups crushed Lady Finger cookies
- 8 oz. cream cheese
- 1 package jello pudding cheesecake
- cocoa powder, for garnish

1. Make brownies according to the package in a 13" x 9" pan.
2. In a bowl, add 2 tbsp. instant coffee to the milk and then add the pudding (3.4 oz), set aside.
3. Beat cream cheese in your mixer, add sour cream, and then pudding mixture. Once combined, add half of the Cool Whip.
4. In another bowl, add the remaining 2 tbsp. of coffee to the hot water. Pour on top of your crushed cookies to soak.
5. Once brownies have cooled, spread 1/4 of the pudding/Cool Whip mixture on top. Place the cookies on top of that and top with the remaining pudding/Cool Whip mixture. Spread remaining Cool Whip on top and sprinkle with cocoa powder.
6. Serve immediately or store in the refrigerator.

 Ingredients

 Pudding/Coffee Mixture
Top: cream cheese/sour cream and then coffee/pudding and Cool Whip added
Bottom: Crushed cookies and cookies with hot water/coffee on top (mushy)

Top: Brownies with 1/4 pudding/Cool Whip mixture
Middle: Mushy Cookies
Bottom: Remaining pudding/Cool Whip and Cool Whip topped with cocoa powder

 Tiramisu Brownie

Enjoy!
Brittney


Wednesday, August 28, 2013

DIY Cardboard Box Fire Truck

So my son is OBSESSED with fire trucks. He plays with his toy fire trucks, we read books about fire trucks, he screams in the car every time he sees a fire truck. My son LOVES fire trucks. So, naturally I was thinking of throwing him a "Fire Truck" themed Birthday Party. Now here in Colorado you can do tours of fire stations, but you can not host a birthday party there. Also, fire fighters will not drive their truck to your house for a party either. I've been brainstorming like crazy trying to figure out what to do that incorporates fire trucks. I came across this birthday party, and I fell in love with their idea. Now I'm not sure how to plan for a fire truck 'race' in mid-November here in Colorado... so I will have a twist!

Below is the first (probably of a dozen) DIY Cardboard Box Fire Truck I made! I'm probably going to be the coolest mommy tomorrow when my son sees this bad boy!

Materials

- cardboard box, size large (my son has long legs)
- can of Red spray paint
- packaging tape
- construction paper
- craft glue
- scissors
- tupperware lids

 Large box assembled with only the bottom taped, top left open with sides folded in so child can sit in and "ride" the fire truck

 Spray painted box

 I used tupperware lids to cut "lights" and "wheels" for the fire truck

I even added a "window" and a "ladder" on each side - completed "Fire Truck!"

Enjoy!
Brittney

Friday, August 16, 2013

DIY Preschool Craft and Breakfast Play Date

I have been busy planning a "Preschool Play Date" for my 2 1/2 year old and his little friends who will be joining him at Preschool next month. I decided to have them come ready for breakfast and do a craft!

For the craft, I decided on a "Look What I Made" frame that they would each paint. I attached binder clips on a string and strung it across the frame so they can display their artwork from school.

 "Look What I Made" Frame Completed (before painted)


Frames from JoAnn's Fabrics on sale for $6 each, 4 x acrylic paint from Hobby Lobby $2.99 each, Scrapbook paper background from Hobby Lobby $0.59 each, binder clips from Target $2.99, Packaging string from Hobby Lobby $3 each
*I asked each mommy to let me know what their Preschooler's favorite color was for their background chevron paper

 Table Scape: Paper bag/chevron wrapping paper as a table cloth and balloons!

Breakfast: Blueberry Muffins, Rainbow fruit salad, Alphabet Cookies, Yogurt/Granola/Fruit, 

 Alphabet Cookies, Rainbow Fruit Salad, Muffins

 Painting their frames!

Kinley Painting


Completed "Look What I Made" Frames

Kinley's friend, Carter, handed each of his friends a book

Unwrapping "The Night Before Preschool" - Thank you Carter!

The littlest siblings behaved during the Toddler Craziness!

The kids had a ball and ate lots of baked donuts and fruit! They even destroyed some snacks and made a complete mess of all our toys - the Play Date was a complete success! 

5 tired toddlers...

Enjoy!
Brittney

Saturday, August 10, 2013

Baked Donuts

When I am stressed I like to workout... when I'm super stressed I like to bake... and then give away what I baked so I don't eat everything I made! Well I have had this "Baked Donut" recipe on my mind lately and the blogger who posted it, even included a nifty link that prints the recipe out for you! I made the dough after dinner this evening and let it rise in my oven while I gave the boys a bath and put them to bed. I just finished making them and demolished 2 donuts and a donut hole! What a delicious dessert! I really think you should try out this recipe, it is definitely a keeper and I look forward to making them again... very soon!

Baked Donuts

*Makes about 15 donuts and donut holes

Dough Ingredients

- 3/4 cups warm milk
- 1 packet Active Dry Yeast
- 1 tbsp. unsalted butter, softened
- 1/3 cup sugar
- 1 egg
- 2 1/2 cup all-purpose flour (plus 2 1/2 tbsp. flour at high altitudes like Colorado)
- pinch of nutmeg
- 1/2 tsp. salt

Glaze Ingredients

- 1/4 cup milk
- 1 tsp. vanilla extract
- 2 cups confectioners sugar
*sprinkles optional

Baked Donuts:

1. Place 1/4 cups warm milk in the bowl of your Kitchenaide mixer. Sprinkle the yeast over the milk and let sit for 5 minutes.
2. In a small bowl, combine the remaining 1/2 cup milk, butter and sugar. Add it to the yeast mixture and stir to combine.
3. Add the egg and stir.
4. Add flour, nutmeg, and salt. Stir until the dough begins to form.
5. Change the beater to the dough hook and knead the dough until smooth. Add more flour to dough if it is too sticky.
6. Transfer dough to a lightly floured surface and knead for 5 minutes. Place in a large lightly greased bowl and cover tightly with plastic wrap. Place in a warm place for an hour, or until dough has doubled in size.
7. Roll dough out on a lightly floured surface until 1/2 inch thick. Cut out the donuts using a donut cutter, or 2 biscuit cutters.
8. Place donuts on a baking sheet lined with parchment paper. Place a clean towel over them and let sit for 45 min.
9. Preheat oven to 375 degrees. Bake donuts for about 6-8 min. I baked mine for 6 minutes and they turned out perfect!
10. Top with glaze!

Glaze:

1. In a small saucepan, warm the vanilla and milk. Slowly whisk in the confectioners sugar.
2. Remove from heat and dip your donuts halfway into the glaze.
3. Place on a cooling rack set over a baking sheet.
4. Top with sprinkles if desired. Let stand for 10 min.

 Dough on parchment paper before being baked

 Baked Donuts

 Glaze

 Glazed Baked Donuts

 Sprinkles!

Donut Holes

Delicious!

Enjoy!
Brittney


Monday, August 5, 2013

Some Recipes... Good and Not So Good

Sorry for the delay in posts! I have been busy coming back from vacation and adjusting to being back on a routine with my boys. I have made a few recipes I'd like to share with you all. The first is a super easy Caprese Chicken - I also made Caprese Pizza which was amazing, but forgot to take pictures of it! So I will include that in another post down the line. I love quinoa so when I saw a recipe for a Mexican Quinoa Bowl, I was thrilled! Plus is called for guacamole and that has to be one of my favorite things of all time to eat!

My son loves chips. Can devour a small lunch sized bag of chips. Can be quiet for 20 minutes eating said bag of chips. So I thought, why not try making my own 'healthy' chips?! Salt and Vinegar Sweet Potato Chips... not so good. But I will include it below in case you get adventurous!

Caprese Chicken

Ingredients

- 4 skinless, boneless chicken breasts
- salt and pepper
- 2 tbsp. olive oil
- 3 garlic cloves, minced
- 2 pints cherry tomatoes, halved
- 10 basil leaves, finely chopped
- 8 oz. mozzarella cheese, sliced in 1/2 inch thick slices
- balsamic vinegar, to taste

1. Season both sides of chicken breasts with salt and pepper.
2. Heat 1 tbsp. olive oil in a pan at medium heat. Add chicken breasts and cover pan for about 10 min. Flip the chicken and allow to continue to cook through.
3. In a medium saute pan, heat other tbsp. of olive oil and add garlic and tomatoes. Cover pan and let cook for 5 min. Remove from heat and add basil leaves.
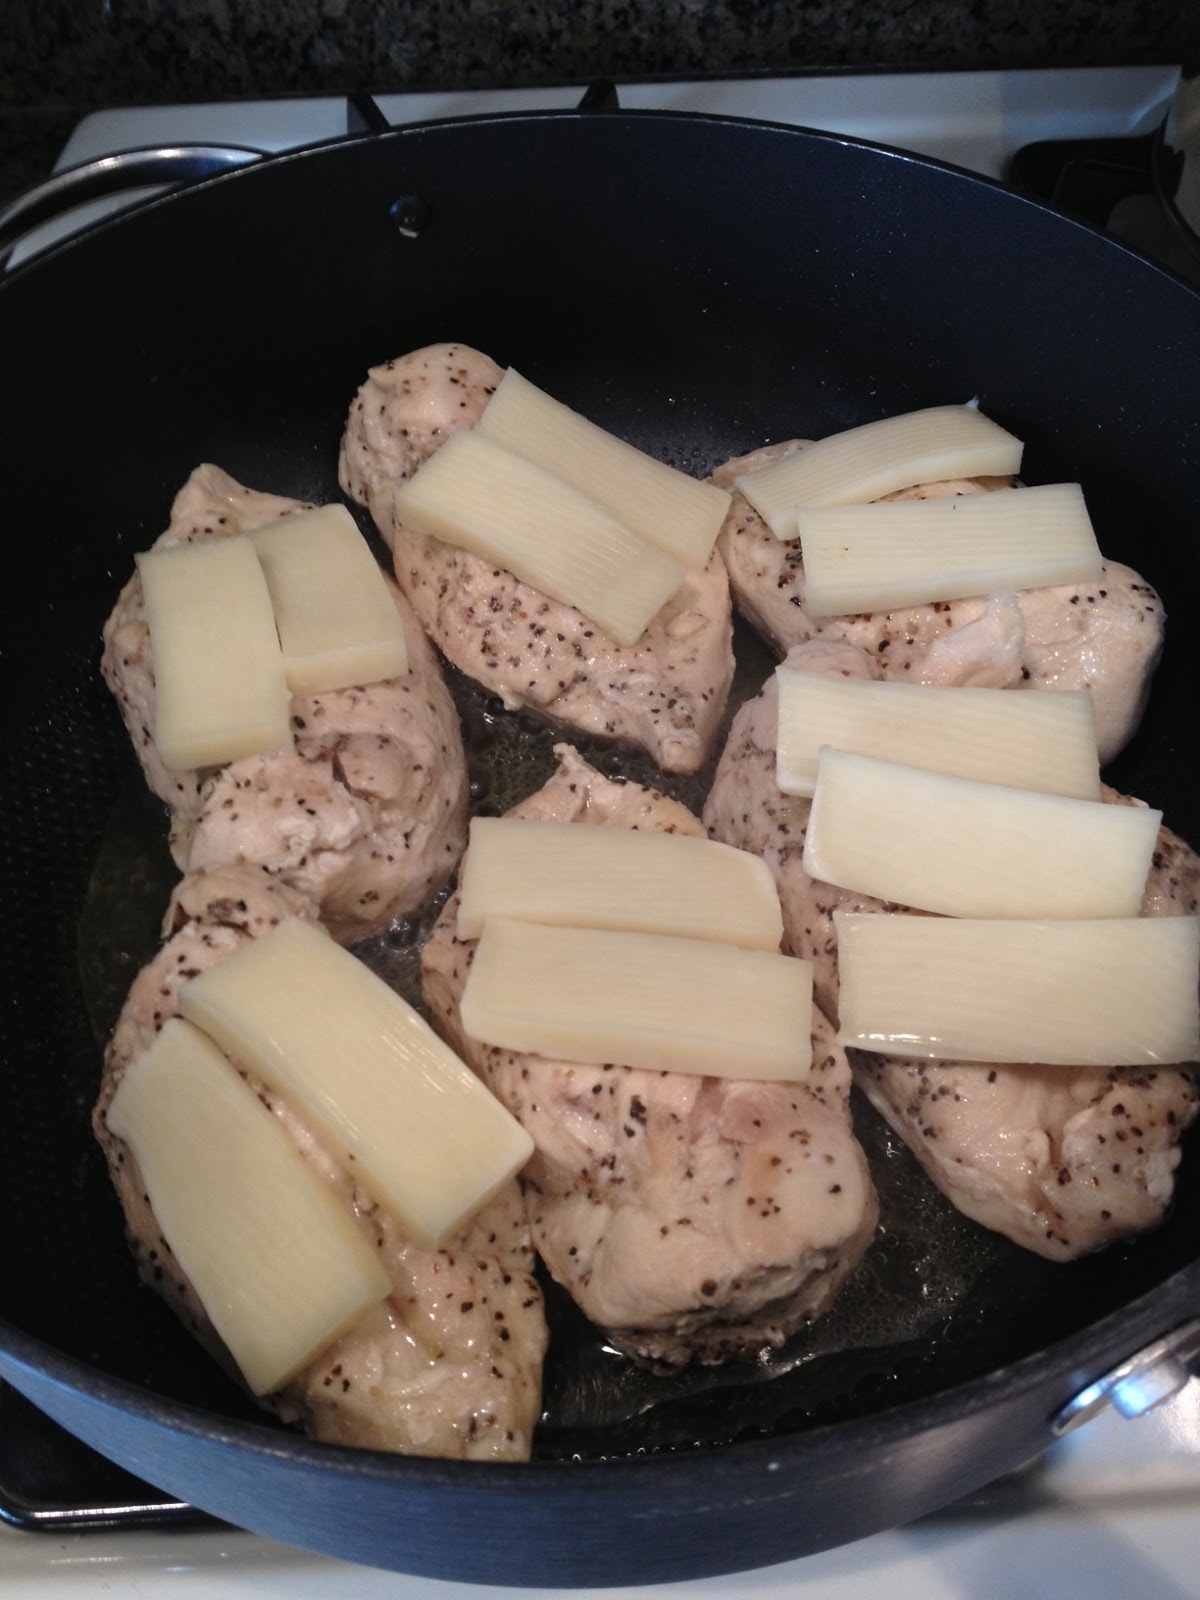
4. Once chicken is done place two slices of mozzarella on each chicken and pour tomato mixture on top, cover for 2 min., or until cheese has melted.
5. Drizzle chicken with balsamic vinegar before serving.

Ingredients

Tomato Mixture

Chicken with Mozzarella Slices

Caprese Chicken

Mexican Quinoa Bowl

Ingredients

- 1 cup quinoa, not cooked
- 2 cloves garlic, minced
- 1 1/4 cups chicken or vegetable broth (I used Organic Chicken Broth)
- 1 can black beans, rinsed and drained
- 1 can diced tomatoes
- 1 cup corn
- 1/2 tsp.  kosher salt
- 1/4 cup chopped fresh cilantro, optional
- 1/4 of a lime, juiced
**Optional Toppings: salsa, sour cream, shredded cheese, guacamole, crushed tortilla chips

1. In a large pan set to medium heat, add garlic. Cook for about 1 min. Add quinoa, broth, diced tomatoes, corn, black beans, and salt.
2. Bring to a boil, reduce heat, cover, and let simmer for 25 min. 
3. Remove from heat and add cilantro and lime. 
4. Serve with your toppings of choice!

Mexican Quinoa Bowl

Salt and Vinegar Sweet Potato Chips

Ingredients:

- 2 small sweet potatoes
- 1 tbsp. rice vinegar
- 1 tsp. sea salt

1. Preheat oven to 425. Line a baking sheet with foil and spray with non-stick spray.
2. Slice sweet potatoes as thin as possible.
3. Mix sweet potatoes in a bowl with rice vinegar and sea salt. 
4. Place sweet potatoes in a single layer on the baking sheet.
5. Bake for 20 min. or until chips are crunchy. 

Ingredients

 Slice the Sweet Potatoes Thin

Mix with Sea Salt and Vinegar

 Single Layer

Sweet Potato Chips

Enjoy!
Brittney


Thursday, July 25, 2013

Summer Recipes

Summertime cooking is fresh, light, and delicious! I have two recipes I want to share that I have made in the last few days. One is a light, pasta dish that has seasoned shrimp. The other is an easy breakfast Blueberry Coffee Cake. The blueberry coffee cake is actually a recipe I have made many times over the past couple of years. It is a great breakfast dish to share with friends, or to give away. It is simple and fresh!

Shrimp Pasta with Tomatoes, Lemon, and Spinach
*found on this blog

Ingredients
1/2 lb. shrimp, peeled and devined
2 tsp. lemon zest, divided
1 pinch crushed red pepper
1 sprig thyme
1 sprig oregano
2 fresh basil leaves, torn
2 tbsp. extra virgin olive oil
2 cloves garlic, minced
1 cup cherry tomatoes, halved
2 tbsp. lemon juice (juice from 1 lemon)
1/2 lb. angel hair pasta (I used whole wheat)
course salt and ground pepper

1. Preheat oven to 350 degrees. Grease a baking sheet.
2. Toss shrimp in a bowl with 1 tbsp. EVOO, red pepper, thyme, oregano, 1 tsp. lemon zest, and basil.
3. Spread shrimp on baking sheet in one layer and place in oven for 6 minutes.
4. Bring a huge pot of water to bowl and cook pasta according to directions on pasta box.
5. Keep 1/2 cup - 1 cup of pasta water before draining all the water from the pasta.
6. Heat 1 tbsp. EVOO in a large skillet and add the garlic and tomatoes. Add the remaining 1 tsp. lemon zest and some salt and pepper.
7. Toss the shrimp in the skillet along with the pasta and spinach.
8. Squeeze the lemon juice and add the reserve pasta water to create a sauce.
9. Serve with Parmesan cheese. 

Shrimp Pasta


Blueberry Coffee Cake

1 1/2 cup flour
1 tsp. baking powder
1/4 tsp. salt
1/4 tsp. baking soda
3/4 cup sugar
6 tbsp. butter, softened
1 tsp. vanilla
1 large egg
1 large egg white
1 1/3 cup buttermilk
2 cups fresh blueberries

1. Preheat oven to 350 degrees. Grease a pie pan.
2. Mix the dry ingredients in a medium sized bowl: flour, baking powder, salt, baking soda. Set aside.
3. With a KitchenAide mixer, cream the sugar and butter together. Add the eggs and vanilla.
4. While mixing on low, add the buttermilk to the sugar mixture.
5. Slowly add the flour mixture to the sugar mixture.
6. Pour half of the batter into the pie pan. Sprinkle 1 cup of blueberries on top.
7. Pour the rest of the batter on top and add the remaining blueberries.
8. Bake for 50 minutes.

 Top: Coffee Cake before and Bottom: After

  Slice of Blueberry Coffee Cake

Enjoy!
Brittney

Tuesday, July 16, 2013

Community

I've  been struggling with writing this post, but it is long overdue. You know the saying "Sticks and stones may break my bones, but words will never hurt me?" I do not believe this saying to be true at all. Words can hurt. Words, poisonous words, hurt. They can tear you up on the inside and cause you to question the type of person you are. I have been struggling with this for an entire year.

Without going into details, I will say that I was hurt by words. I was verbally attacked and treated unkindly. And I have been suffering. The words lashed out at me, just because I was being who I am: taking care of my family, being a good friend, daughter, mother, wife - really hurt me. These words caused me to question the type of person I was, and not in a positive way. I consider myself to be highly educated, smart, independent, strong, influential, and a giver in every sense of the word. I am a generous person. But I am not weak and I will stand up for myself and my family. These words made me hurt, and I cried more than I care to admit, for an entire year. I also felt incredibly alone, and at times, incredibly angry. To top off these feelings, I was pregnant with our second son and raising our toddler by myself, while my husband was away serving our country. So life has not been easy!

But I guess you just can't please everyone and do every thing to make others happy. Your happiness begins with yourself. It has taken me the better part of a year to accept this. I cannot change other people, I can only continue to be myself and to be strong for my family. I am an extremely busy mother of two with a husband who is Active Duty Army and not always home. But there is a silver lining to all this hurt and pain I have suffered through - realizing I have support. My support community is beyond anything I could ever have imagined. I am eternally grateful for my husband, immediate family, and friends. Without them, I would not have been able to function or pull myself out of this downward spiral of hurt feelings. Crying to my husband, explaining how hurt I was to my mom, or even just allowing the distraction of a friendly play date with a friend, helped me through this.

My Community is so much more than people, they have become like family to me. They have all showed me they care about me. Went out of their way to send me messages asking how I was, or stop by with dinner, or took care of my plants while I was gone. I have formed beautiful, long lasting relationships with my "mommy" friends and our children play well together. I have even kept up relationships with friends who are long distance and, although, we do not see each other often, we do keep in touch. I am so lucky to be surrounded by this Community. 

I struggled with finding and maintaining my identity after I was so brutally bashed last year. But I have found it again and realized that I can help others and others can help me through our common interests and current phases in our lives. I am a member of a few online "Army Wives Groups" where support is offered. Women who are military spouses and have children, and who like me, have questions and need advice and support. It is such a beautiful system filled with hope. "You are not alone" rings clear in these groups, and they have helped me out more than they will ever know.

I feel like I am at a better place. The love and support of my husband is even more strong now than it was when we got married. He gets me and I get him, and we love each other. I am so lucky. We have two beautiful little boys whose faces light up when they see me. I am so lucky.

So I want to thank all of you out there who have touched my life this past year. You may not have known that I was struggling inside, but by simply being a part of my life, you have helped me get through this rough patch.

 My beautiful boys

 My sweet "Mommy" friends

Play date with "Army" friends

 My Family

 My Love

Enjoy!
Brittney