Monday, April 29, 2013

Open a "Box of Sunshine"

My sister is currently deployed to Afghanistan... so I am always looking for good ideas/holiday ideas/ fun things to send her to brighten her day a little! I found this awesome idea to send her a "Box of Sunshine" complete with PDF files with cute notes to include. The basis of the gift is to buy a bunch of items that are the color "yellow" and send them to someone to brighten their day a little. Now I know she's working hard over there, since "every day is a Monday," so I thought this would be perfect for her to receive! 

We love and miss you, Aunt Rae Rae and we hope you enjoy your surprises! Here are some pictures of the box and the "yellow" items we included for her.

 PDF note we included

 "Yellow" items to include a picture frame with a picture of her nephews (and some yellow nail polish)!

 "Sunshines" cut out from a picture my son colored

"Open a Box of Sunshine!"

Enjoy,
Brittney

Tuesday, April 23, 2013

Earth Day Play Date

Happy Earth Day! I have been planning this "play date" for my 2 year old and his little buddies for a month! I wanted to get the kids together to plant their own "Lorax" pots that I found on Pinterest. I also made a semi-healthy snack of a "Tree-on-a-Stick" out of Trix cereal and marshmallows. My husband even bought a tree for us to plant in our backyard! Luckily we had fantastic sunny weather to do all this, since the next day we woke up to a Winter Wonderland - only in Colorado! Below are my pictures documenting this fun Earth Day Play Date.

 Small Terra Cotta pots, googly eyes, yellow yarn, orange cotton balls... and a glue gun!

 Lorax Pots

 "Trees-on-a-Stick"

A Tree!

 Table Scape with pots, Marigold seeds and soil

Planted Lorax Pot

 Planting their Seeds

 Outside putting dirt on the tree

Ta-Da! The Tree!

And of course a play date would 't be complete without some playing... 

Enjoy!
Brittney


Thursday, April 18, 2013

Kyle's 30th Birthday Cake

Well ski season ended here in Colorado, so of course we get tons of snow! So we are headed to the mountains to take our 2 year old skiing for the first time. My husband turns 30 years old tomorrow, so we decided to celebrate his birthday a day early. Every year since we have been married, I have given him a few cake choices (always with chocolate in them) to choose from and I make him the cake he wants. Win/Win for me since I get to bake something new and get to eat it, too! This year Kyle decided he wanted a Flourless Chocolate Cake with Raspberry Sauce. It was delicious - just the right amount of a rich chocolate taste with a tart raspberry sauce! Here is the recipe I got from TLC Cooking and a few pictures. Enjoy!

Fourless Chocolate Cake

Ingredients:
7 oz. Baker's semi sweet chocolate
3/4 cup unsalted butter
5 eggs, separate yokes and whites
1 tsp. vanilla
1/3 cup sugar
2 tbsp. unsweetened cocoa powder
1/8 tsp. salt

1. Preheat oven to 350 degrees. Grease a 9 in. springform pan.
2. Heat chocolate and butter in a sauce pan. When melted, remove from heat and whisk in egg yokes, vanilla. Add sugar, cocoa powder and salt.
3. Beat egg whites until they peak.
4. Stir 1/4 of chocolate mixture in with the egg whites and then add the rest to the chocolate mixture.
5. Spread batter evenly in springform pan and bake for 25-30 minutes or until a toothpick inserted in the center comes out clean.
6. Let cake cool 2-3 min. Loosen cake edges with a knife and remove the side of the cake pan. Cover and refrigerate.

Raspberry Sauce

Ingredients:
12 oz. bag frozen raspberries, thawed
1/3 cup sugar

1. Place raspberries in a blender and blend until smooth.
2. Optional: Strain seeds and add sugar to remaining raspberry sauce.
*We chose to place our sauce in a saucepan and heated it up. So good!

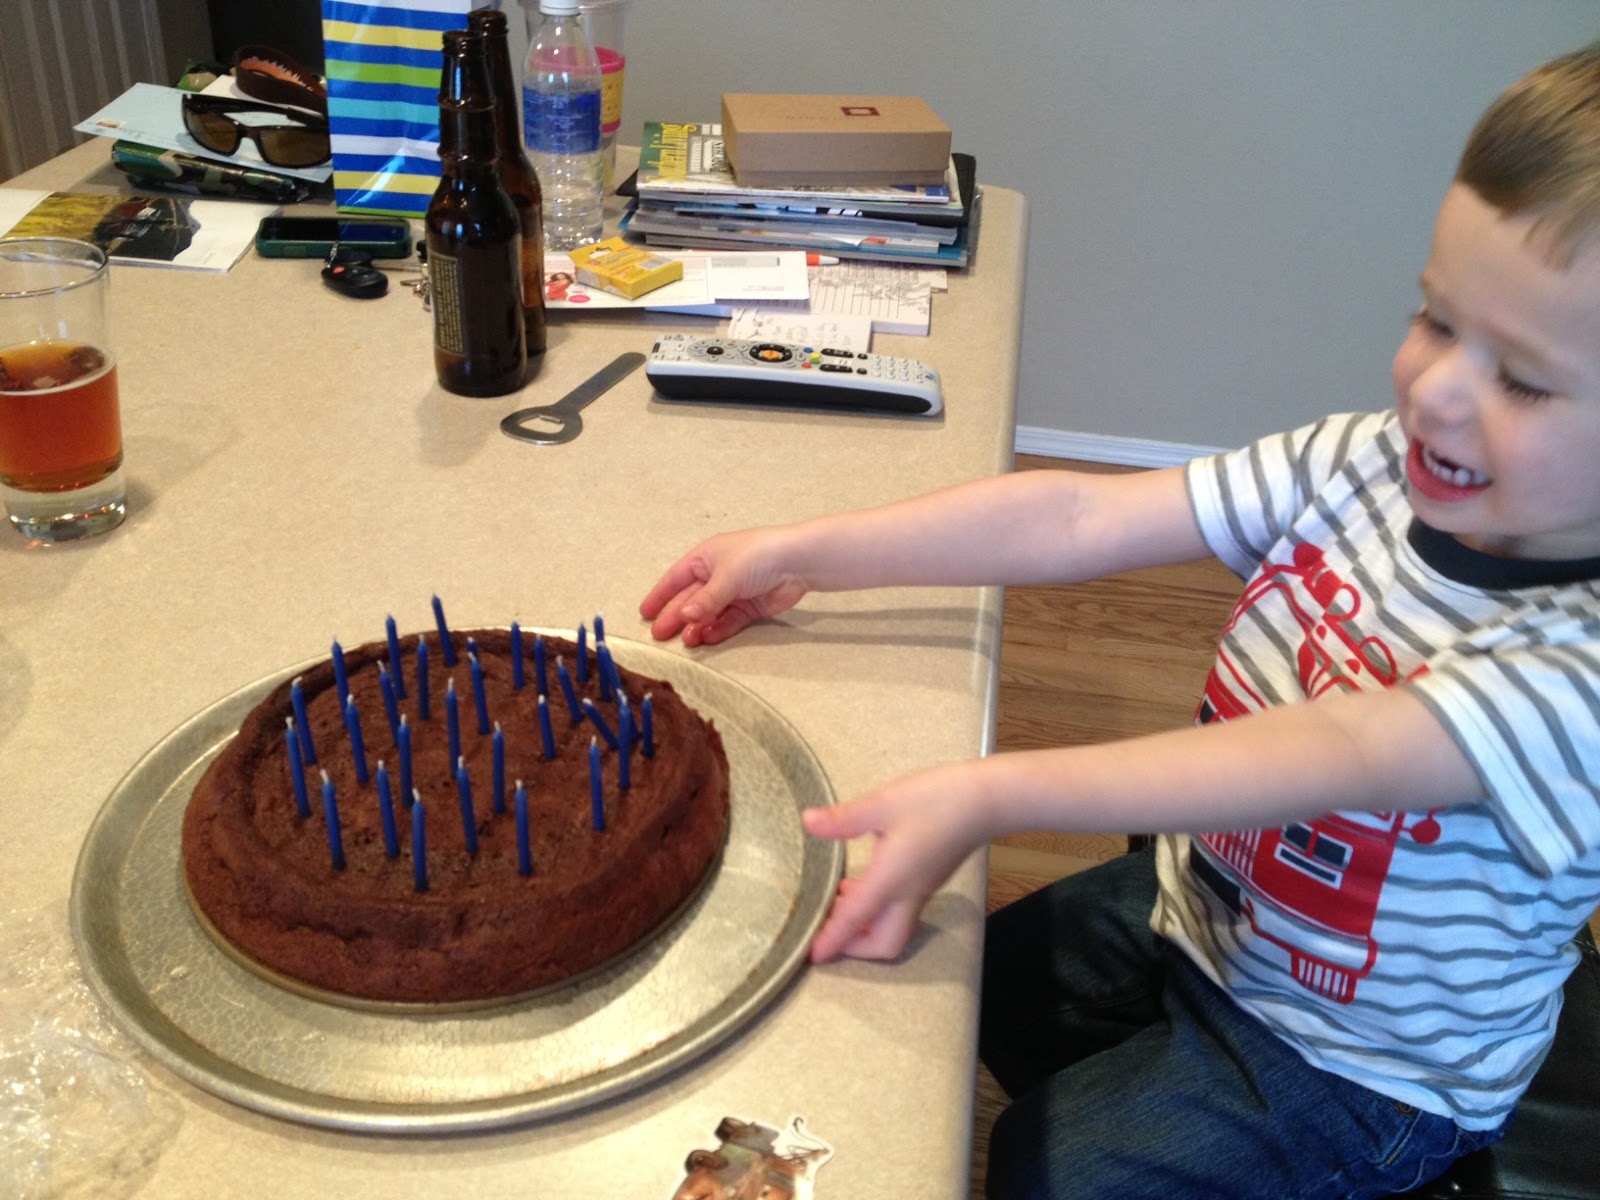
Our 2 year old placing 30 candles on Daddy's Birthday Cake

Flourless Chocolate Cake served with warmed Raspberry Sauce

Enjoy!
Brittney

Tuesday, April 9, 2013

Peanut Butter Chocolate Chip Muffins

During my last trimester I craved peanut butter! Peanut butter and jelly sandwiches, peanut butter banana Greek Ben&Jerry's yogurt... you name it, if it had peanut butter, I wanted a taste! So naturally I would come across this recipe for Peanut Butter Chocolate Chip Muffins and give birth the next day! Well I just made these delicious muffins and wanted to share the recipe with you. No sugar is used and they have peanut butter - a great source of protein.

Peanut Butter Chocolate Chip Muffins

Ingredients:
2 1/4 c. flour
2 tsp. baking powder
1/2 tsp. salt
2/3 c. brown sugar packed
6 tbsp. butter, melted
1/2 c. chunky peanut butter (I used Natural Smooth)
2 eggs
1 c. of milk
3/4 c. mini semi-sweet chocolate chips (I used regular sized chocolate chips)

1. Preheat your oven to 375 degrees.
2. In a large mixing bowl mix the flour, brown sugar, salt and baking powder together. Set aside.
3. Using a mixer, mix the melted butter, eggs, peanut butter and milk together. Slowly add the flour mixture.
4. Mix until combined. Fold in chocolate chips.
5. Scoop 3 tbsp. of muffin mix to paper lined muffin pan.
6. Bake 15-17 min.

 Ingredients

 Peanut Butter Mixture

Flour and Peanut Butter Mixture

 Add chocolate chips!

 Muffins

Delicious!

Enjoy!
Brittney


Sunday, April 7, 2013

Lemon Cheesecake Morning Buns

I meant to write a blog last week... but I had my baby boy! Palmer Rainier Brengel arrived at 4:50 pm on March 26, 2013, weighing 7 lbs and was 19.5 inches long. We have been busy adjusting to our new family member and learning how to function on less sleep and still entertain our 2 year old! Life is busy!

My little guys, Kinley and Palmer

Last Sunday was Easter and we were invited to a friend's house for Easter Brunch. I was told I didn't have to bring anything since I had just had a baby... but how could I show up empty handed?! I decided to try a recipe I found on Pinterest, that was actually pretty time consuming, but they turned out so good! Here is the recipe for Lemon Cheesecake Morning Buns:


Lemon Cheesecake Morning Buns


Recipe by: Willow Bird Baking
Yield: 24 buns

These morning buns could easily double as dessert. They are fluffy, gooey, tangy, buttery, and beyond delicious. I hope you’ll find a space for these rolls on your breakfast or brunch table. They definitely belong in the spotlight.

Roll Ingredients:
1 package (2 1/4 teaspoons) active dry yeast
1/4 cup warm water (100-110 degrees F)
2 tablespoons white vinegar
2 cups milk minus 2 tablespoons, room temperature
2/3 cup cold shortening
3 tablespoons sugar
1 teaspoon salt
1 teaspoon baking soda
1 teaspoon baking powder
5 cups flour
2 tablespoons butter, melted, for after baking

Filling Ingredients:
2 (8-ounce) packages cream cheese, softened
zest of 1 lemon (reserve a little for topping)
1/2 cup sugar
2 tablespoons lemon juice
1 egg, room temperature
1 stick salted butter (or 1 stick unsalted butter and 1/4 teaspoon salt), melted

Glaze Ingredients:
2 cups powdered sugar
1 table lemon juice
1/2 teaspoon vanilla extract
about 1/4 cup milk
extra lemon zest

Directions:
Note on proofing: This yeast dough proofs for a couple of hours after you mix it up, and then the assembled rolls proof in the fridge overnight, so allow for this when planning to make this recipe. With most cinnamon rolls recipes you could switch this and proof in the fridge overnight and then assemble and proof on the countertop, but I opted to switch that method with these because I didn’t want the cream cheese filling sitting out too long. 

Note on yield: I don’t recommend halving yeast recipes; instead, if you don’t want 24 rolls at once, consider freezing some for later. 

Note on freezing: To freeze some of the unbaked rolls, just wrap them well before the second rise and freeze them. Once frozen, pop them out of the pan all together and store in the freezer, wrapped in plastic wrap and in a zip top bag or wrapped in foil. When you want to bake them, stick them back in a greased pan, thaw them in the fridge overnight, proof for the instructed amount of time, and bake like usual.


Mix the warm water and yeast in a medium bowl and let the yeast foam for about 10 minutes. Put 2 tablespoons white vinegar in a measuring cup and then add milk up to the 2 cup line. Set this aside. In a separate large bowl (or the bowl of a mixer fitted with a dough hook), whisk together flour, sugar, salt, baking soda, and baking powder and cut the shortening into the mixture with two knives or a pastry cutter until the shortening looks like small peas. Stir yeast mixture and milk mixture into the dry ingredients and mix well, kneading just a few turns. Transfer the dough to a bowl lightly sprayed with cooking spray, cover tightly with plastic wrap, and proof in a warm, draft-free place (such as a closed, turned-off oven), for around 2 hours or until doubled in size.

After proofing the dough, lightly spray two 9 x 13-inch baking dishes with cooking spray. Cream the softened cream cheese in a medium bowl until fluffy before adding lemon zest, sugar, lemon juice, and the egg. Mix together until well combined.

Turn the dough out onto a floured surface and roll it into a large rectangle about 1/8-inch thick (I carefully cut the dough in half and worked with half at a time to make it more manageable; if you do this, just spread on half of the filling ingredients for each half you roll). Spread the melted butter over the surface of the rolled dough and then dollop the cream cheese mixture all across the surface, spreading gently to create an even layer. Gently roll the dough up into a spiral (I find using a bench scraper to encourage the dough to roll up during this process incredibly helpful) and cut it into 2-inch rolls, placing them close together in your prepared baking dishes (at this point, you could wrap and freeze the rolls for later if you wanted). 

Cover the rolls let them rise in the fridge overnight (they will have nearly doubled.) When you’re ready to bake, preheat the oven to 400 degrees F, letting the rolls rise on top of the preheating oven covered by a clean dish towel. Bake them for about 25-30 minutes or until lightly browned on top (don’t underbake or they’ll still be doughy in the center). Brush with 2 tablespoons melted butter and return to the oven for 1 more minute. Whisk together the glaze ingredients and drizzle the glaze over the warm rolls. Sprinkle with reserved zest and serve immediately.

 Dough rolled out with the lemon cheesecake filling on top

 Fresh out of the oven!

Yummy!

Enjoy!
Brittney